- Your cart is empty
- Continue shopping
-
 snrmedaka.us
 - Posted on
- Categories:Medaka Guides & Tips
- 0 comments
How to Hatch Medaka Eggs – Step-by-Step Guide for Beginners
Hatching medaka egg care is essential for successful fry development. In this step-by-step guide, you'll learn how to create the ideal conditions for your medaka eggs to hatch — covering everything from water temperature and light exposure to fry feeding and environment control. With the right techniques, you can raise strong, vibrant medaka from egg to juvenile.
Learn more about medaka at Wikipedia - Japanese Rice Fish.
Step 1: Hatching Medaka Egg – Prepare the Container
Use a clean, shallow container such as a plastic tub or small aquarium. Surprisingly, using chlorinated tap water can be beneficial when hatching medaka eggs. The low levels of chlorine in tap water help prevent fungal growth during the early stages of incubation.
There’s no need to use dechlorinated or aged water at this stage. In fact, using tap water directly can reduce the chance of eggs turning white due to fungus. Just make sure to avoid sudden temperature changes and place the container in a stable location away from wind or direct drafts.
Step 2: Hatching Medaka Egg – Water Temperature
The optimal temperature for hatching medaka eggs is around 75–80°F (24–27°C). Hatching is based on cumulative temperature — a total of about 450°F is needed. For example, at 77°F, eggs typically hatch in approximately 6 days.
Step 3: Hatching Medaka Egg – Light Exposure
Medaka eggs benefit from light exposure. Use indirect sunlight or a low-intensity aquarium light to help stimulate development and prevent fungus growth.

Step 4: Hatching Medaka Egg – Fungus Prevention
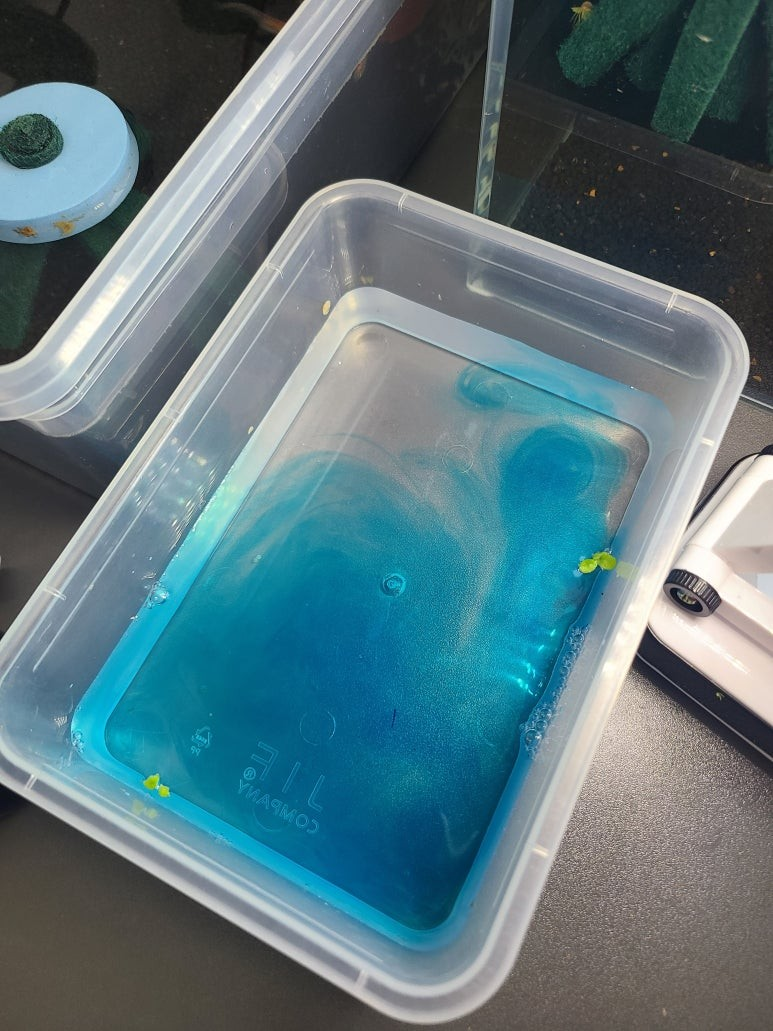
Check your eggs daily. Remove any that turn white, as they’re no longer viable and can spread fungus to healthy eggs. If fungus continues to appear, you may optionally add a very small amount of methylene blue to the water.
To maintain the freshness of your eggs, replace about 30% of the water in the container with fresh tap water every 2–3 days. This ensures a continuous presence of chlorine, which helps suppress fungal growth naturally. Over time, the methylene blue will gradually fade as it is diluted by the new water — this is expected and not a concern.
Step 5: Hatching Medaka Egg – Monitor Development
After a few days, you’ll begin to see tiny eyes and tails inside the eggs. These signs indicate the fry are forming well. Be patient and avoid moving the eggs unless absolutely necessary.
Step 6: Hatching Medaka Egg – Final Hatching Stage
When eggs begin to wiggle or shake slightly, hatching is near. Some fry hatch on their own, while others may take an extra day. Ensure there’s no surface debris or strong current that could interfere with the hatching process.
Step 7: Caring for Newly Hatched Fry
Once hatched, fry are extremely small and should be moved to a fry-safe tub or tank to prevent being eaten by adult medaka. They can survive on their yolk sac for 2–3 days before needing food.
Start feeding the fry on day 3 after hatching. They do not need food before that. You can begin with PSB liquid or finely powdered fry food. As the fry grow into juveniles, you can gradually introduce newly hatched brine shrimp or infusoria to support their nutrition.
Offer small amounts of food twice a day to ensure healthy development. Avoid overfeeding, as leftover food can quickly degrade water quality and lead to fry mortality.
We recommend feeding Itosui Medaka Food — a finely crushed, high-protein feed designed specifically for medaka fry.
Do not change the water for the first 7–10 days after the fry are born, as they are extremely sensitive to water quality changes during this period. Instead, maintain stable water conditions and monitor carefully for any issues.
While air aeration is not essential for medaka fry, if you choose to use it, make sure the airflow is very gentle. Strong bubbling can disturb fry or stress them during their fragile early stage.
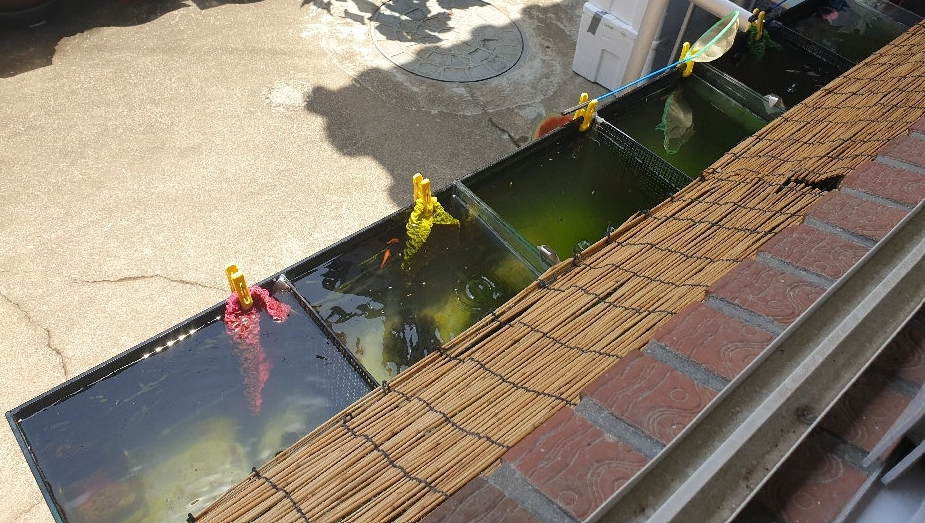
Raising Fry with Proper Lighting and Stable Conditions
Light is the most crucial aspect of fry rearing. Keeping containers in sunny spots accelerates growth and decreases mortality. However, in dim places, growth is stunted and mortality increases. It’s best to raise them outdoors, but placing containers near a window is sufficient indoors. If lighting is poor, supplement with bright artificial light.
Direct sunlight can raise the water temperature above 104°F, which is dangerous for medaka. To avoid this, create shade with screens or use white containers or transparent aquariums, which help prevent sharp temperature increases.
Final Tips for Hatching Medaka Egg Successfully
Remember, creating a stable and healthy environment during the incubation period is crucial for successful hatching of medaka eggs. By maintaining the proper temperature, monitoring water quality, and providing suitable nutrition, you can increase the chances of hatching healthy and vibrant fry.